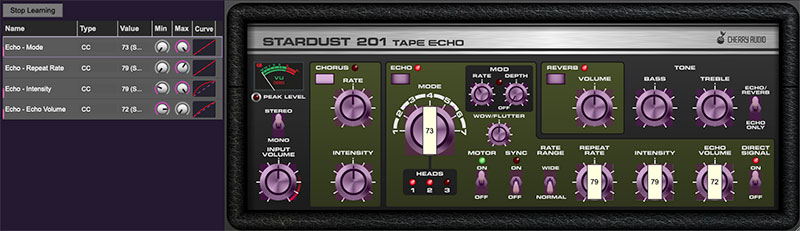
Assigning external hardware controls adds a whole new dimension of control and musicality - it's especially effective for manipulating the Repeat Rate and Intensity knobs, and Motor switch in real time. The MIDI Tab is where controller assignments can be viewed and tweaked. It's highly flexible and really easy to use.
Note that some DAWs handle MIDI controller assignments for effects plugs differently than others - some DAW software doesn't pass MIDI data to plug-ins in effects slots. Specifically, Logic Pro has its own way of handling MIDI to effects, which we'll explain later in this section. If MIDI controllers aren't assigning to onscreen controls as expected, you may need to consult your DAW user guide, or do some Google/YouTube research.
Basic External Hardware Control Assignment
This is the quick, "I just want to assign a hardware control right now!" section. In this example, we’ll assign a hardware slider control to the Repeat Rate knob.
Begin by right-clicking on the Repeat Rate knob and selecting MIDI Learn.
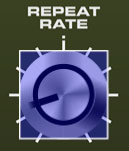
A transparent purple overlay appears over the knob, indicating that it's in learn mode. Now move the desired hardware control device. The purple overlay disappears and the hardware control will move the Repeat Rate knob. If you get cold feet (or accidentally put the wrong control into learn mode), learn mode can be aborted by right-clicking and selecting Stop Learning.
This is the basic procedure for assigning hardware controllers to almost any Stardust 201 control.
The MIDI Tab
This is command central for all MIDI controller assignments. Here you’ll be able to see information about all currently assigned controllers and adjust control ranges. There's also an additional method for assigning controllers which is useful for quickly setting up multiple controls.

To view or hide the MIDI Tab, click the MIDI button in the top toolbar.
MIDI Learn button- This is almost the same as enabling MIDI learn mode by right-clicking a control. Click the MIDI Learn button to enter learn mode (all controls turn purple). Unlike right-clicking on specific controls, where Stardust 201 automatically exits controller assignment mode, clicking the MIDI Learn knob "stays on" to enable assignment of multiple hardware controls. This is handy for quickly assigning a bunch of sliders or the buttons of a grid-style controller.
To assign multiple controls, click MIDI Learn, click an on-screen control, move the desired hardware knob or slider, continue clicking and assigning on-screen controllers until all desired controls are assigned, then click Stop Learning to exit learn mode.
When in MIDI learn mode, previously assigned controller numbers are displayed atop of the relevant control. These indicate the MIDI continuous controller number of the assigned hardware control (these are also displayed in the MIDI library tab at left).
Once a MIDI controller has been assigned, in addition to real-time control of a Stardust 201 parameter, you’ll also be able to record and play back controller data from a DAW.
Controlling Multiple Parameters With A Single Hardware Control
A single hardware controller can be assigned to simultaneously operate as many controls as desired. This can be very powerful when combined with Min/Max and Curve controls in the MIDI Tab (see the Super Cool Min-Max Tricks section below).
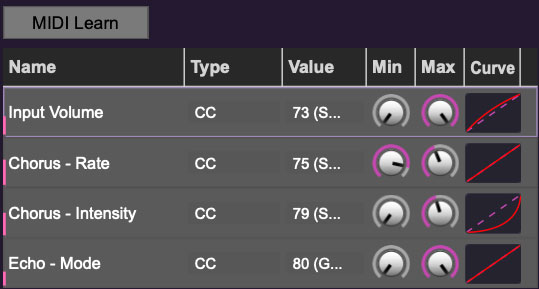
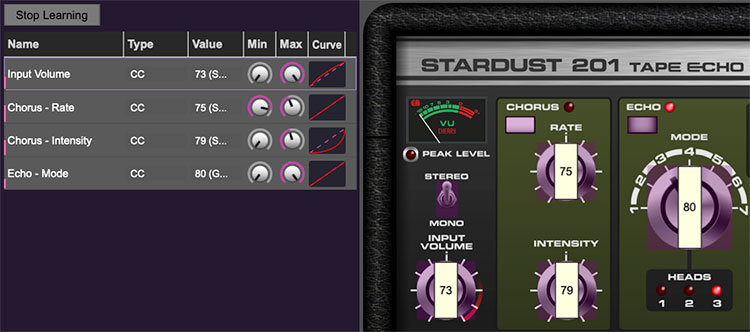
MIDI Tab Columns
Name- Displays the name of the parameter being controlled.
Type- There are five possible types of controller automation in Stardust 201:
Note- Notes played on a MIDI keyboard controller, expressed as C-1 to G9
CC (MIDI Continuous Controller)- The standard 128 MIDI controller numbers as defined in the MIDI spec. More specifically, these are the controllers transmitted by hardware knob and slider controls. MIDI CC’s can be used to control parameters in real-time or recorded and played back within DAW software.
MMC (MIDI Machine Control)- The MIDI control protocol for tape machine-style transport controls. Back in the dark ages, this was used to control wonky old Tascam and Fostex reel-to-reel monsters, but it's useful if your MIDI controller has tape-style transport control buttons.
Pressure- Some keyboard controllers transmit controller data when keys are pressed and released as they're held down. The vast majority of keyboard controllers with aftertouch transmit "mono" aftertouch only; in other words, aftertouch data is the sum of all keys to one single data stream.
Key- This allows keys of the computer QWERTY keyboard to at as button controls for Stardust 201's onscreen controls.
Value- Displays the specific automation controller. In the case of a Note this would show a MIDI note number (C-1 to G9); for a MIDI CC, this would be the MIDI CC controller number, etc. Clicking on the value opens a pop-up menu where all values can be selected.
Min- Sets a limit on the lowest value any automation control can set a mapped controller to. This recalibrates the range of the automation controller to the remaining parameter range.
Max- Sets a limit on the highest value any automation control can set a mapped controller to. This recalibrates the range of the automation controller to the remaining parameter range.
Super Cool Min-Max Tricks- Not only can parameter ranges be limited via the the Min and Max knobs, mapped control destinations can be completely inverted by setting the Min knob all the way up and the Max knob all the way down (or anywhere in between).
Limiting and inverting parameter ranges with the Min/Max controls is particularly useful when multiplexing a single hardware control to operate multiple parameters. Along with the Curve control, the customization possibilities are really flexible.
Curve- These allow the customization of how incoming MIDI CC controls affect the movement of Stardust 201's onscreen controls, ranging from exponential to linear to logarithmic curves.
MIDI Tab Column Configuration Right-Click Menus
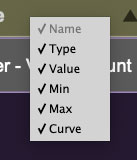
Right-clicking anywhere in the top row (Name, Type, Value, etc.) displays the column configuration menu. Checking/unchecking these allows hiding and display of each column. This has no effect on assignments.
MIDI Tab Parameters Right-Click
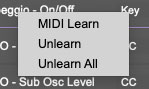
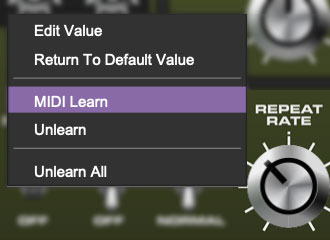
Right-clicking on an assigned parameter opens the menu above.
MIDI Learn- This is used to change the controller assigned to a particular parameter.
Unlearn- Deletes the selected automation parameter.
Unlearn All- Deletes all controller assignments for the patch. Stardust 201 will display a warning dialog prior to deletion in order to thwart potential unlearn-related disasters.
Configuring MIDI Hardware Controllers In Logic Pro
Logic does not pass MIDI data to effects opened in standard mixer channel effect slots. This means that MIDI controller assignment as described above will not work (specifically, nothing will happen when controllers are moved in MIDI Learn mode). There are two ways to successfully assign MIDI controllers to effects plugs in Logic.
Logic Controller Assignment Method #1
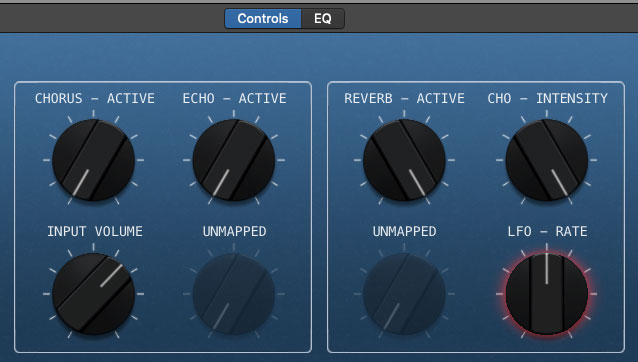
The first method is to use Logic's dubiously named Smart Controls window that looks something like this (depending on the currently selected template). It creates a new window that approximates the plug-in UI.
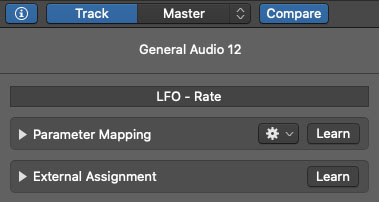
A number of plug-in controls are automatically assigned to the Smart Control knobs and switches; if the parameter you'd like to assign a controller to isn't present, Smart Control knobs or switches can be reassigned by clicking the i button, clicking the Learn button next to Parameter Mapping, clicking on a Smart Control knob, then clicking the desired control in Stardust 201's UI.
Assuming that the desired parameter is now a Smart Control, external MIDI controllers can now be assigned by clicking the Learn button next to External Assigment, and moving the relevant hardware controller.
Logic Controller Assignment Method #2
In case it wasn't clear, we're not big fans of Logic's impressively kludgey Smart Controls- we prefer the following alternative method that lets you use Stardust 201's onboard MIDI assignment controls and tab as described at beginning of the section.
As mentioned, Logic does not pass MIDI data to plug-ins when they're opened in a standard plug-in slot. But you can "trick" Logic into thinking a plug-in is a virtual instrument - which will properly receive MIDI data. Here's how:
Create a new virtual instrument mixer channel.
Click on the channel's Instrument pop-up at the top of the channel and scroll down to AU MIDI-controlled Effects>Cherry Audio>Stardust 201 Tape Echo
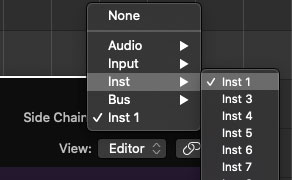
At this point, we have a plug-in in an instrument slot, so we need a way to get sound into it. This is accomplished using the Sidechain Input pop-up in the upper-right corner - click on the appropriate category and choose the channel you'd like to process. This effectively configures Stardust as a bus effect, that is, the dry signal will be audible if the fader of the incoming track is up, so it's advisable to set the Direct Signal switch to the Off position.
As mentioned, with Stardust configured as an AU MIDI-controlled Effect, all of its MIDI learn functionality will work correctly.