Mercury-6 can operate in as a single instrument, a stacked dual-sound instrument, or a dual-sound instrument with a keyboard split. In this section we'll explain Mercury-6's powerful Whole, Layer, and Split mode operation. We'll start in the middle of the panel:
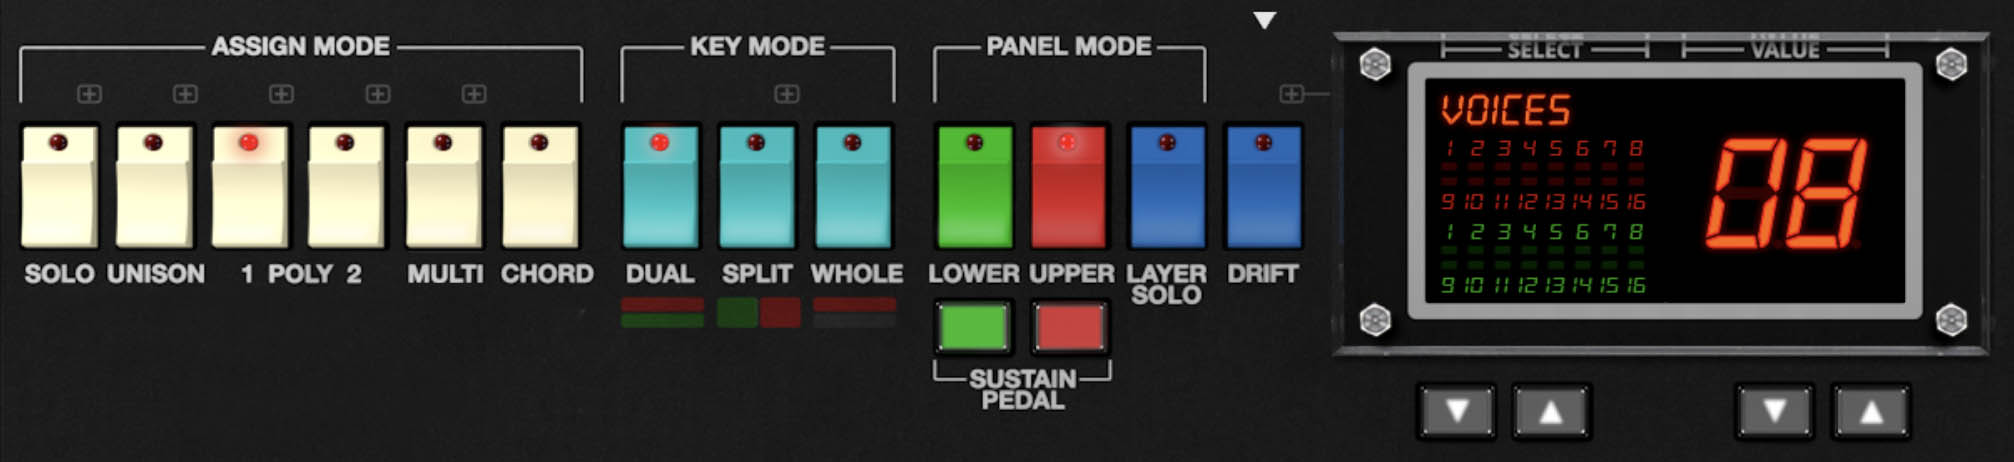
Key Mode
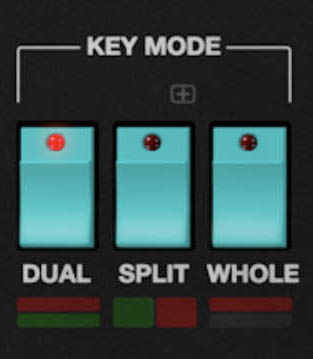
Globally sets keyboard voice triggering.
Whole- This is the standard keyboard mode. The upper voice plays across the entire keyboard range, and the lower voice is disabled.
Layer- Upper and lower voices are stacked and play across the entire keyboard range.
Split- The keyboard is split with the lower voice playing in the keyboard range below the split point, and the upper voice playing in the keyboard range above the split point.
To set the split point, first make sure Split mode is enabled, then click the Split button. The LED on the button will flash; now play the key of the desired split point either on the onscreen keyboard or a MIDI controller. The LED note display stops flashing and the split point is set. The white split-point triangle above the keyboard will jump to the current split point (cool, huh?).
For you pragmatic numerical types, the split point can also be selected by clicking the LED note display and choosing a note from the popup note selection menu.
Panel Mode
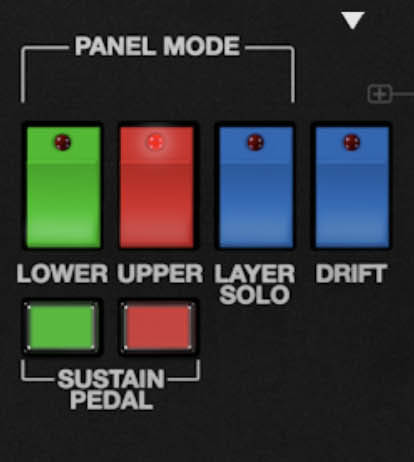
This innocuous little section is super important. As explained above, Mercury-6 can operate in three modes: Whole, where one sound plays across the entire keyboard range, Layer, where two separate sounds (layers) are stacked across the entire keyboard range, or Split, where two individual sounds are played above and below a user-specified split point.
With this in mind, the Panel Mode section allows selection of which control parameters are currently displayed when in Layer or Split mode. These two sounds are referred to as the Lower or Upper layers.
Lwr (Lower)/Upr (Upper)- Selects whether the onscreen controls show current settings for the lower or upper layer.
When Upper is selected, the LEDs for all controls will be red, and all relevant knob and slider marks indicator lines will be orange. When Lower is selected, the LEDs for all controls will be blue, and all relevant knob and slider marks indicator lines will also be turn blue. The rectangular Layer header on the left side of the panel will be orange when upper mode is active, and blue when when Lower mode is active.
Layer Solo- Solos the layer currently selected Lower or Upper layer for editing. This is really useful if you're editing a sound on a layer and don't want to hear the other layer. The Layer Solo button only works in Layer and Split Key Modes. When toggled, the Layer Solo button flashes in the appropriate red or blue color so you won't forget you're in solo mode.
Utility- The Utility button popup menus allow upper and lower layer sounds to be moved back and forth, independently initialized, and more.
Swap Upper and Lower Layers- Reverses the locations of the the upper and lower layer.
Copy Layers- Duplicates one layer to the other.
Reset Layer- Initializes all settings of the selected layer.
Copy Effects- Duplicates the settings of all effects from one layer to the other. Keep in mind that if you'd like the same effects for both layers, effects can be set to Global mode by clicking the the blue Global effects tab and choosing FX Mode / Global.
Import/Export- The Import/Export command allows layers to be moved between sound presets. Data from the source preset isn't affected.
The process is simple - select the appropriate Copy <Upper or Lower> to Memory sub-menu to copy the data into Mercury 6's memory, then choose the destination preset, click the Utility button and select the appropriate Paste to Layer submenu.
The "You should really read this" Section
Following are some tips that should make this Lower and Upper business easier to understand, complete with bold text, so you know we mean business. (Don't push us, or we'll mash the CAPS key too and sound like one of those grammatically impaired unhinged internet weirdos.)
Switching between Lower and Upper parameter display has no effect whatsoever on sound, it just alternates which layer's knob and button settings are currently displayed.
Whole Key Mode always uses the upper layer only.
Panel Mode Upper and Lower selection only works in Layer and Split Key Modes. When in Whole mode, Upper is automatically selected and the Lower and Layer Solo buttons are disabled and grayed out.
Lower and Upper layer sounds always save as one single sound patch.
Almost all of Mercury 6's parameters are duplicated and independently settable for the Lower and Upper layers. The exceptions are Master Volume and its associated Limiter, and all effects tabs and associated controls if Global FX Mode/Global is active (more about this in the Effects section).
Layer Section
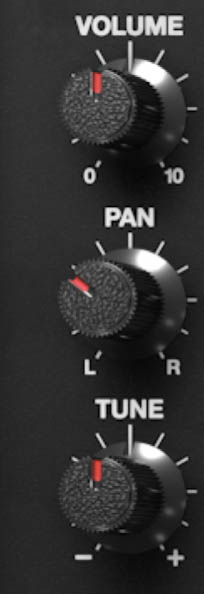
This functions as sort of a master settings for each layer. These are independent for each layer.
Volume- Sets the layer volume.
Pan- Sets the position of the layer in the stereo image. The Pan knob only affects dry signals - Flanger/Chorus, Delay, and Reverb effect wet signal panning isn't affected (because you don't want big, wide stereo chorus, for example, collapsing into one-speaker mono).
Tune- Sets the tuning of the layer, up or down by 100 cents. This control may seem like a "set and ignore" control, but it's useful in Layer mode, because VCO-1 doesn't have a fine-tuning control. Without the Layer Tune control, tuning for both layers of VCO-1 would be always be locked; Layer Tune allows some detuning for fatter sounds.
Drift- Applies a random amount of independent tuning drift to the synth oscillators and filter frequencies for a more authentic analog character. And note that unlike other Cherry instruments, the Drift knob is independent for each layer.
We generally recommend always leaving Drift turned up a bit, but there's one situation where we actually recommend setting Drift to zero: If you're using the Cross Mod Manual control to get in-tune note relationships. Since the Manual control is so touchy (as is the real thing), dialing Drift to zero makes it much more stable.