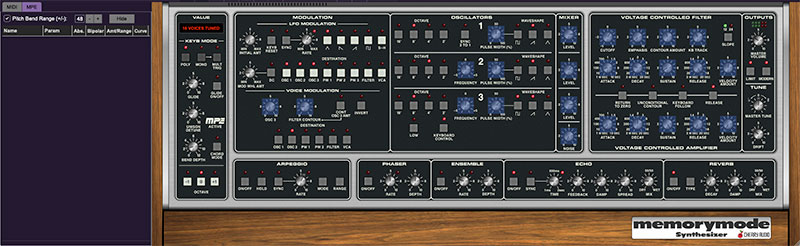
Memorymode supports MPE, short for "MIDI Polyphonic Expression." It's a specialized MIDI protocol enabling multidimensional controllers for controlling multiple parameters of individual notes. MPE specifies the MIDI messages used for three dimensions of control, regardless of how a particular controller physically expresses them. MIDI channel 1 is used as a master channel for global pitch bend, aftertouch, etc.; MPE utilizes MIDI channels 2-15 for the remaining controller data.
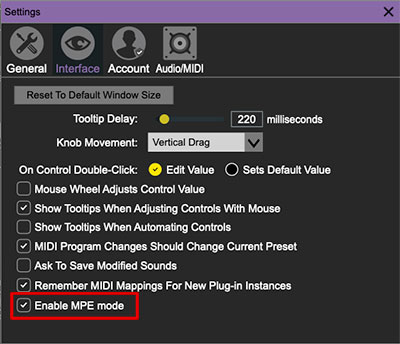
To enable MPE mode, MPE needs to be be enabled in the Settings menu. Click the Settings gear icon in the top purple toolbar, then the Interface tab, then check the Enable MPE mode box. Exit out of the Settings window and click the MPE icon in the top tool bar.
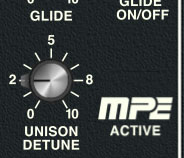
Memorymode will display this fanciful graphic in the Keyb Mode section when MPE is enabled:
Do not enable MPE mode if you're not using an appropriate MPE controller. Memorymode will not play correctly with a standard USB MIDI controller while in MPE mode.
(^^ This ^^ is the section we'll snarkily refer you to when above thing happens and you freak out on the interwebs about our "buggy" and "defective" plug-in. FWIW, I've personally made this mistake numerous times, which is why we added the little graphic.)
MPE Control Tab

Once MPE is enabled, a button appears in the top purple menu strip. Click it to hide or show the MPE tab.
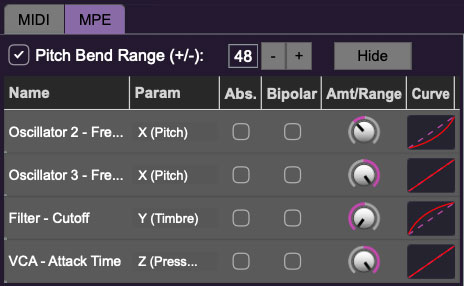
Pitch Bend check box and Range controls- At the top of the tab is a checkbox which enables pitch bend; to its right is the pitch bend range control. Its default setting is 48 semitones (four octaves). For best results you will need to match this number with your MPE controller's pitch bend setting (most MPE controllers default to 48 semitones).
IMPORTANT: If MPE mode is enabled, you must use a MPE controller set to ”Lower Mode” to achieve full MIDI control. If you're using a non-MPE MIDI Controller, or the QWERTY Musical Typing keyboard, only one mono voice will trigger.
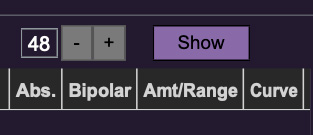
Show/Hide Button - Clicking the Show button in the MPE panel highlights all of the available MPE mappable control sliders for the Memorymode with blue overlays atop panel controls. Click the Hide button to hide them.
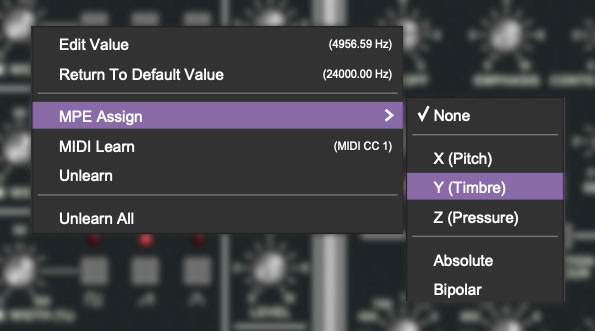
To map a control slider, right-click or [OPTION]+click (Windows) / [CONT]+click (Mac) the slider you wish to map. This reveals the controller mapping menu. Select MPE Assign.
Options are:
X (Pitch)
Y (Timbre)
Z (Pressure)
Note: Some MPE controllers such as the Roli Seaboard may have as many as five dimensions of expression. Memorymode utilizes the three standard dimensions: Pitch, Channel Pressure, and Timbre. Also, not all MPE controllers are equipped with a master/global pitch bender.
Once mapped, the Name and Parameter will be visible in the MPE tab. A yellow square indicator (X,Y,Z) also appears atop each of the mapped controls.
MPE Tab Columns
Right-clicking any of the column headers opens a popup menu allowing each header to be shown or hidden.
Name- Displays the name of the parameter being controlled.
Parameter- Displays and allows selection of the three controller types: X (Pitch), Y (Timbre), and Z (Pressure).
Absolute- Sets the Amt/Range of the controller to absolute or relative control.
Bipolar- Enables bipolar controller, i.e. the ability to add and subtract the parameter amount, as opposed to positive only.
Amount/Range- Sets the intensity of control range. If set to Absolute mode, two knobs appear for min/max settings.
Curve- These allow the customization of how controller data affect the movement of Memorymode's onscreen controls, ranging from exponential to linear to logarithmic curves. Click and drag on the red line and pull up or down to adjust the curve.
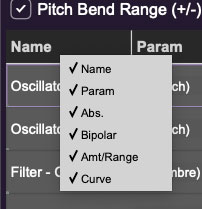
MPE Tab Column Configuration Right-Click Menus
Right-clicking anywhere in the top row (Name, Type, Value, etc.) displays the column configuration menu.
Auto-size This Column- Automatically resizes so that all text in this column is visible.
Auto-size All Columns- Automatically resizes all columns simultaneously so that all text visible.
Column View Filters- Clicking any of these will hide or show the respective columns.
MPE Tab Parameters Right-Click
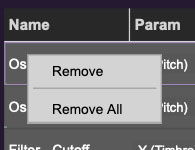
Right-clicking on an assigned parameter opens the menu above.
Remove- Deletes the selected MPE controller parameter.
Remove All- Deletes all MPE controller assignments for the patch. Memorymode displays a warning dialog prior to deletion in order to thwart potential disasters.
MPE Mappable Parameters
Below are all mappable Memorymode MPE parameters. Note that only polyphonic parameters (i.e. parameters that independently affect individual notes) can be mapped with MPE.
|
SECTION |
PARAMETER |
|---|---|
|
MODULATION / VOICE MODULATION |
OSC 3 |
|
MODULATION / VOICE MODULATION |
FILTER CONTOUR |
|
OSCILLATORS |
OSCILLATOR 1 PULSE WIDTH (%) |
|
OSCILLATORS |
OSC 2 FREQUENCY |
|
OSCILLATORS |
OSCILLATOR 2 PULSE WIDTH (%) |
|
OSCILLATORS |
OSC 3 FREQUENCY |
|
OSCILLATORS |
OSCILLATOR 3 PULSE WIDTH (%) |
|
MIXER |
OSC 1 LEVEL |
|
MIXER |
OSC 2 LEVEL |
|
MIXER |
OSC 3 LEVEL |
|
MIXER |
NOISE LEVEL |
|
VOLTAGE CONTROLLED FILTER |
CUTOFF |
|
VOLTAGE CONTROLLED FILTER |
EMPHASIS |
|
VOLTAGE CONTROLLED FILTER |
CONTOUR AMOUNT |
|
VOLTAGE CONTROLLED FILTER |
KEYBOARD TRACK |
|
VOLTAGE CONTROLLED FILTER |
ATTACK |
|
VOLTAGE CONTROLLED FILTER |
DECAY |
|
VOLTAGE CONTROLLED FILTER |
SUSTAIN |
|
VOLTAGE CONTROLLED FILTER |
RELEASE |
|
VOLTAGE CONTROLLED FILTER |
VELOCITY AMOUNT |
|
VOLTAGE CONTROLLED AMPLIFIER |
ATTACK |
|
VOLTAGE CONTROLLED AMPLIFIER |
DECAY |
|
VOLTAGE CONTROLLED AMPLIFIER |
SUSTAIN |
|
VOLTAGE CONTROLLED AMPLIFIER |
RELEASE |
|
VOLTAGE CONTROLLED AMPLIFIER |
VELOCITY AMOUNT |
MPE Controller Devices
Following is a list of MPE controllers as of 2023. We're sure your Sweetwater rep is just dying to sell you one (and follow up that sale with 47 phone calls: "Hi, this is Brett! How are those dual 1/4" TRS cables workin' out for ya?")
Expressive E - Osmose
Roli - Seaboard
Sensel - Morph
Joué Music - Joué Play
Keith McMillen Instruments - K-Board Pro 4
Haken Audio - Continuum Fingerboard
Roger Linn Designs - Linnstrument
Artiphon - Instrument 1