Getting Started
PS-20 Primer
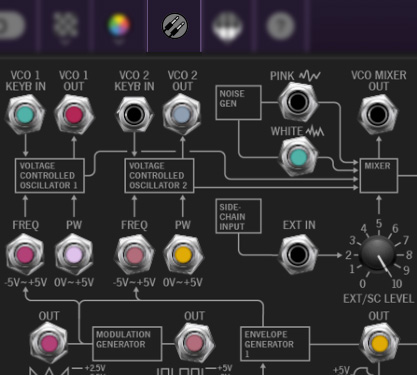
Top Toolbar, Preset, and Focus Control
VCO 1 and 2
Mixer
Highpass and Lowpass Filter
Modulation Generator
VCA
Envelope Generator 1 and 2
Voice Assigner and Pitch Settings
Output Section
Patch Panel Cables
Using The Patch Panel
Patch Panel Extras
External Signal Processor
Sequencer
Effects
MIDI Controllers Setup and The MIDI Tab
Using MPE
QWERTY Musical Typing Keyboard (MTK)
Settings
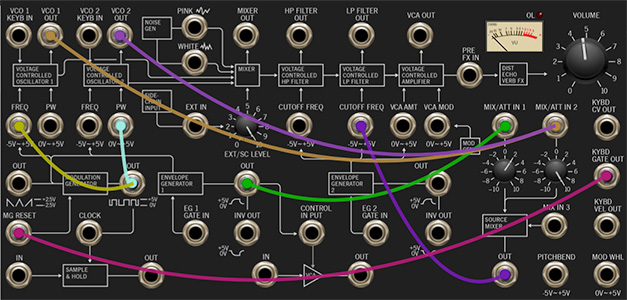
The original MS-20 patch panel is one of its greatest, yet misunderstood features. Though it added a lot of power and modular synth-like flexibility, it could be frustrating because it omitted a number of audio and modulation connections. Adding to this, it could be hard to understand due to its non-standard terminology, its "total" mod input, and the remote (relatively speaking) location of the mod attenuators.
Though PS-20's patch panel appears identical at a quick glance, it's actually quite different, and we've made a fair effort to address most of its flummoxing issues - mainly adding a number of connections and other features. As a result, PS-20 has almost all of the power and flexibility of a full modular synth. We've also changed some of the panel labels to reflect more familiar modern synth terminology, which should make it far easier to wrap your head around.
The patch panel makes use of the exact same highly refined cabling system used in our Voltage Modular instrument. We believe it's the slickest, most refined virtual synthesis cabling system on the planet, so patching cables is super easy and intuitive. It also has some great not-immediately-obvious features, so read on...
Basic Cable Operations
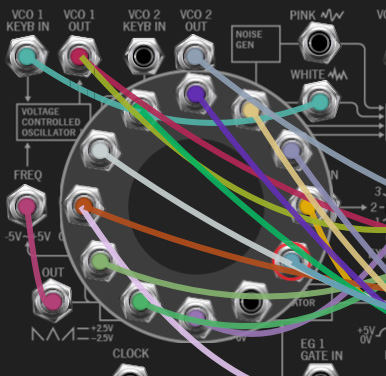
Patching A Cable- Simply click on a jack, drag the cable to the desired destination jack and release the mouse button, but be aware of that unlike a hardware synth, all jacks are exclusively an input or an output. To clarify this, when a jack is clicked and held to patch a cable, jacks not available as destinations are grayed out. For example, if you’re patching a cable from an output jack, all other output jacks are temporarily grayed out. The same applies if you’re patching a cable from an input jack- all other input jacks are grayed out.
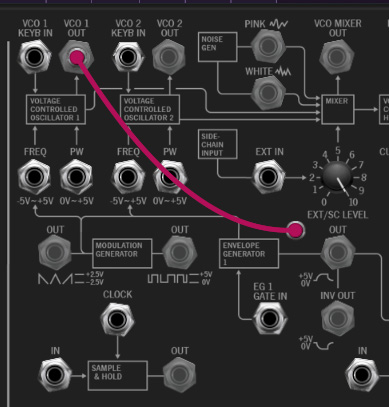
In the screenshot above, the VCO 1 Out is being patched, causing all other output jacks to become grayed out, while all input jacks are potential destinations, thus their appearance remains normal.
Disconnecting A Cable- Cables can be disconnected by grabbing one end of a jack and dragging it to any "not-a-jack" panel location, or by right-clicking on a jack and selecting Disconnect Cables.
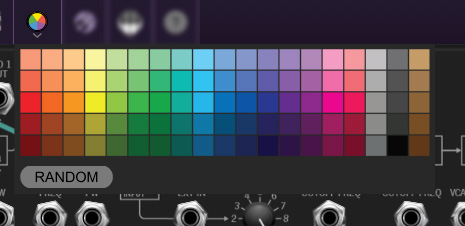
Selecting Cable Colors- There are a couple of ways to select cable colors. The most obvious way is to click the color wheel in the top menu bar to reveal the color picker palette and select a global color. By "global," this means all newly patched cables will be the chosen color (or a random color, if Random is selected). Existing cables are not affected.
To change the color of an existing patched cable, right-click on one of the jacks it’s connected to, then click a new color. This changes only that cable, and won’t affect the global cable color in the top menu bar.
Super Handy "Pre-Patching" Cable Color Selection- Right-clicking a jack that doesn’t have a cable plugged in opens the color palette and changes the global color; the same as clicking the color selector in the top menu bar. This is convenient for specifying a cable color right before patching a new cable.
Adjust Cable Transparency- Clicking the checkerboard icon in the top toolbar displays the cable transparency horizontal slider. Slide this to the left for more transparent cables, or to the right for more opaque cables.
Show/Hide Cables- Clicking this hides or shows all cables. It has no effect on sounds, and its status does not save with patches. When cables are hidden, colored dots will still show in the jacks. Cables visibility can also be toggled with the key shortcuts [CTRL-D] (Windows) or [⌘-D] (Mac).
Advanced Cable Shortcuts and Tricks
Following are some not-so-obvious shortcuts that seriously speed up patching operations.
The Unlimited Mult Hiding Beneath Every Jack
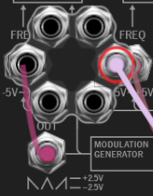
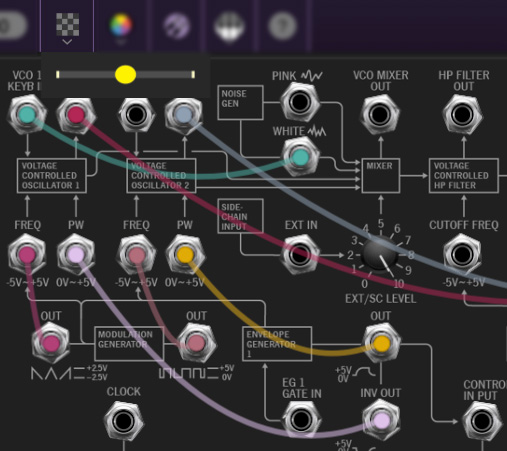
Single-clicking on any input or output jack reveals a six-way multiple jack (aka, a "mult"), which is super convenient for routing (or mixing) multiple sources. The mult stays visible until a cable is routed, at which point it disappears.
The jack mult art animates when it opens or closes, but if you're one of those impatient, overcaffeinated types, the animation can be disabled by clicking the Settings gear icon in the top menu strip, clicking the Cables tab, and unchecking Enable Animations For Jacks (the "impatient, overcaffeinated type" responsible for this pref is the author of this manual).
The integrated jack mults initially display six jacks, but if more than six connections are added, the "ring" grows and additional jacks appear and there's no limit to the number of mult jacks that can be added to a connection. We designed this with Voltage Modular in mind, where the number of modules and cables can quickly get huge, but just know it's there if you need it.
Move or Unplug Multiple Cables Plugged Into A Single Jack
Multiple cables plugged into a single jack can be moved at the same time by holding the [SHIFT] key and clicking and dragging to a new destination. This is also a super fast way to unplug multiple cables from a single jack if the mouse button is released in an "empty" area (i.e., not on a jack).
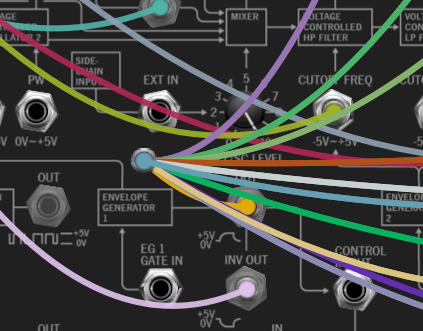
Rapidly Routing A Cable To Multiple Destinations
This one’s not so obvious, but it’s really handy. To patch cables from a single jack to multiple destinations, press and hold the [CTRL] key in Windows or the [⌘] key on Mac , click the source jack, then click as many destination jacks as desired and release the modifier key when you’re done. This works with input or output jacks.