Modulation
By now, you know that the oscillators, filter, and amp give the DS-2 its raw voice and shape. The Modulation section is what gives that voice extra dimension and character. This is where the synth starts to pulse, bend, drift, and respond to performance in expressive ways. A good static patch can sound impressive for a few seconds seconds, but a good modulated patch reveals new life the longer you play it.
The DS-2 gives you three LFOs, one more than the original: a flexible 6-slot LFO’s Mixer, and a 4-slot Touch section for routing aftertouch to a wide range of destinations. Taken together, these make the synth far more capable than its vintage roots might suggest. You can create the expected vibrato, tremolo, and filter sweeps, of course, but you can also build rhythmic pulses, stepped motion, delayed animation, expressive pressure-based performance changes, and layered modulations that make a patch feel alive.
The easiest way to work with DS-2 modulation is to think in three layers:
First, choose an LFO with the right musical personality: smooth, stepped, random, or wheel-controlled.
Next, decide where it should go in the LFO’s Mixer by clicking the Assign/Destination label and choosing a destination.
Finally, use the Touch section for the things you want under your fingers rather than always running in the background. (To do this, click the Assign label and choose a destination.)
This approach avoids the classic trap of adding modulation everywhere just because you can. The DS-2 can do a lot of modulation, but the best patches usually don’t try to show all of it at once. A single well-chosen pitch movement, a little filter animation, and one expressive aftertouch assignment will usually sound more musical than six unrelated modulations all fighting for attention.
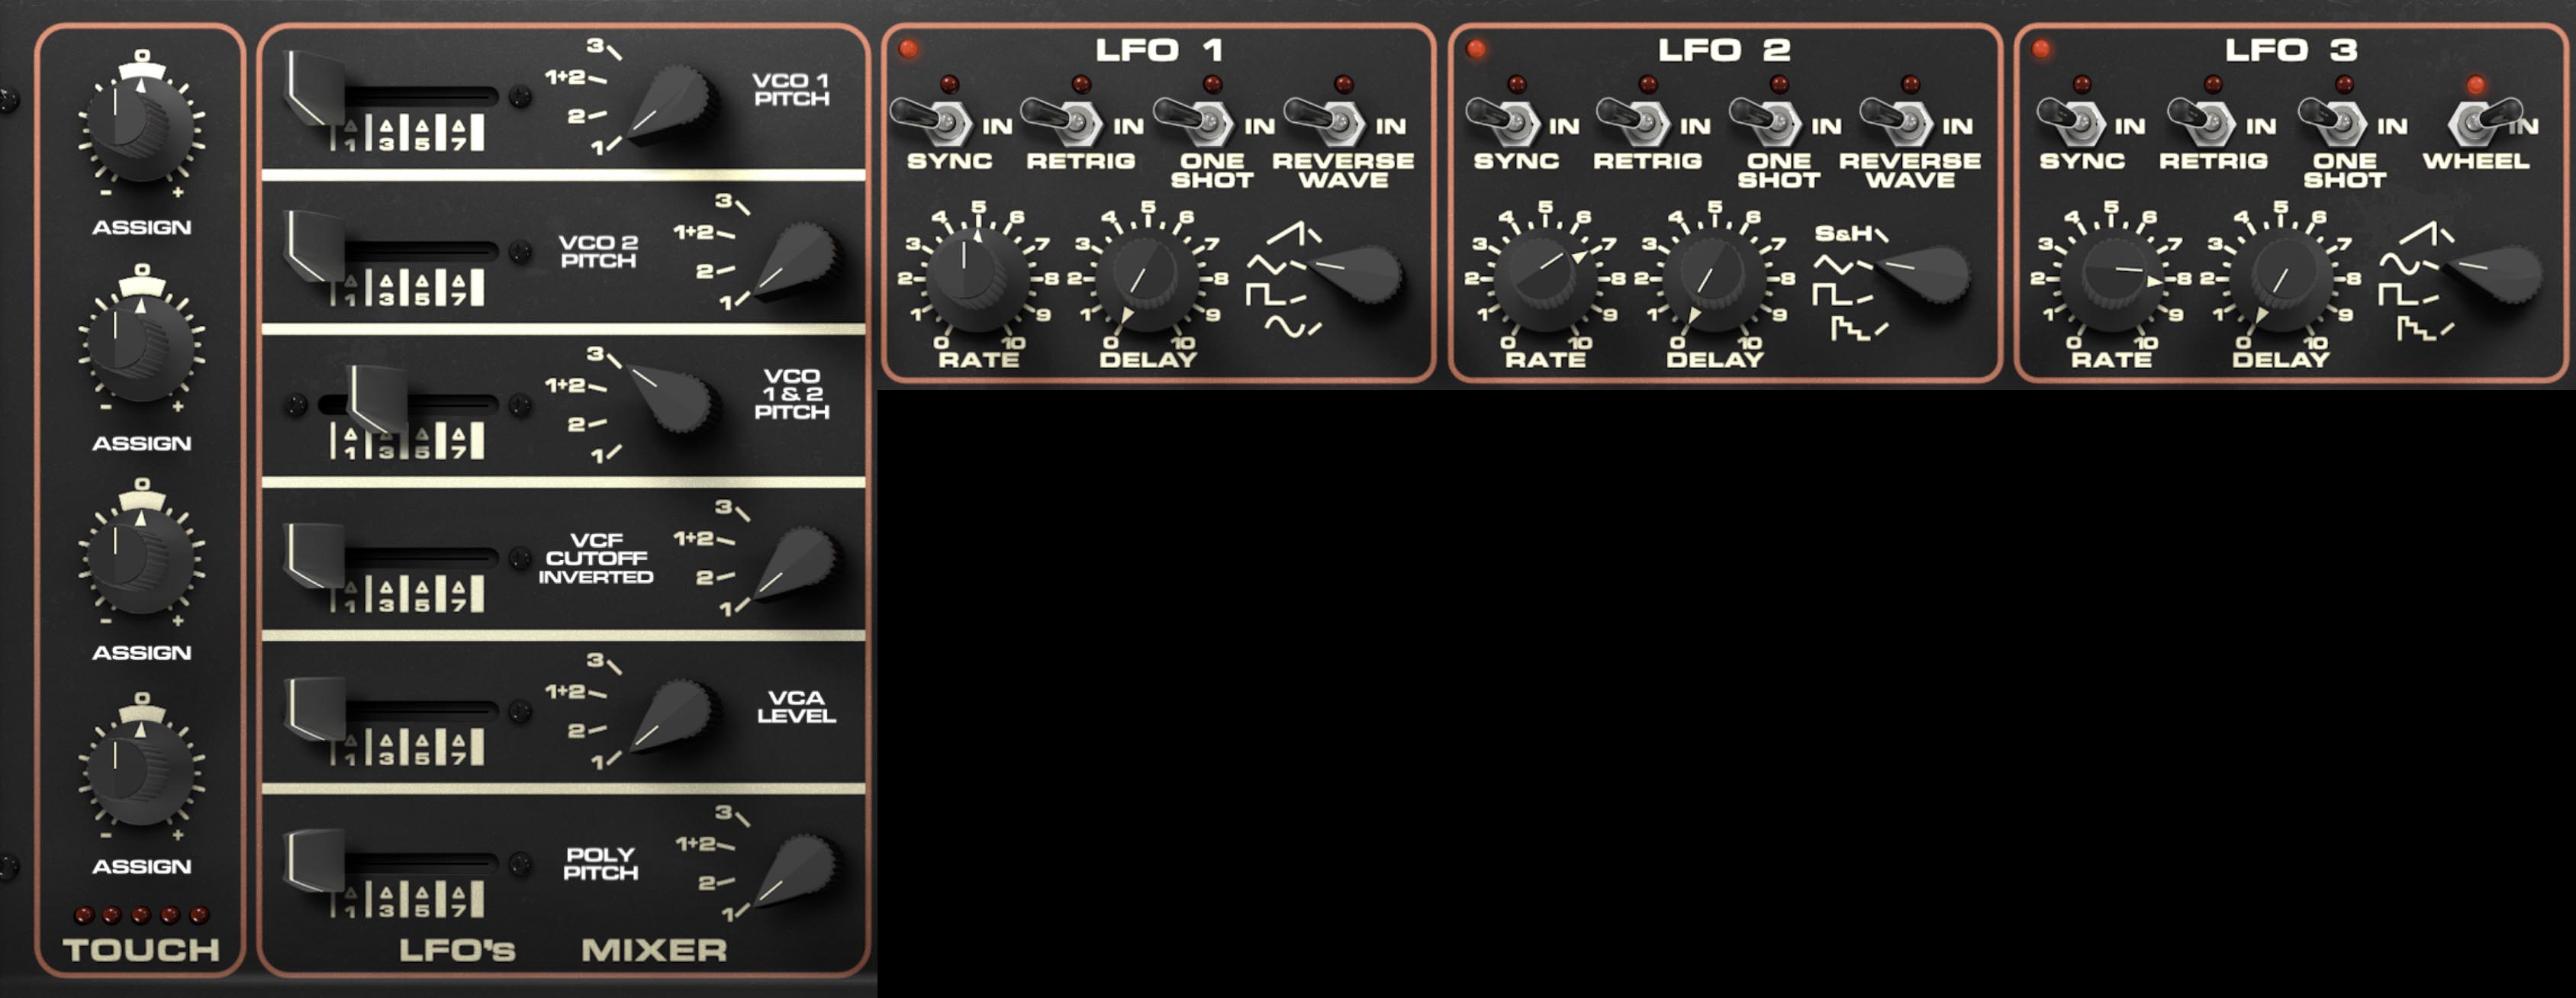
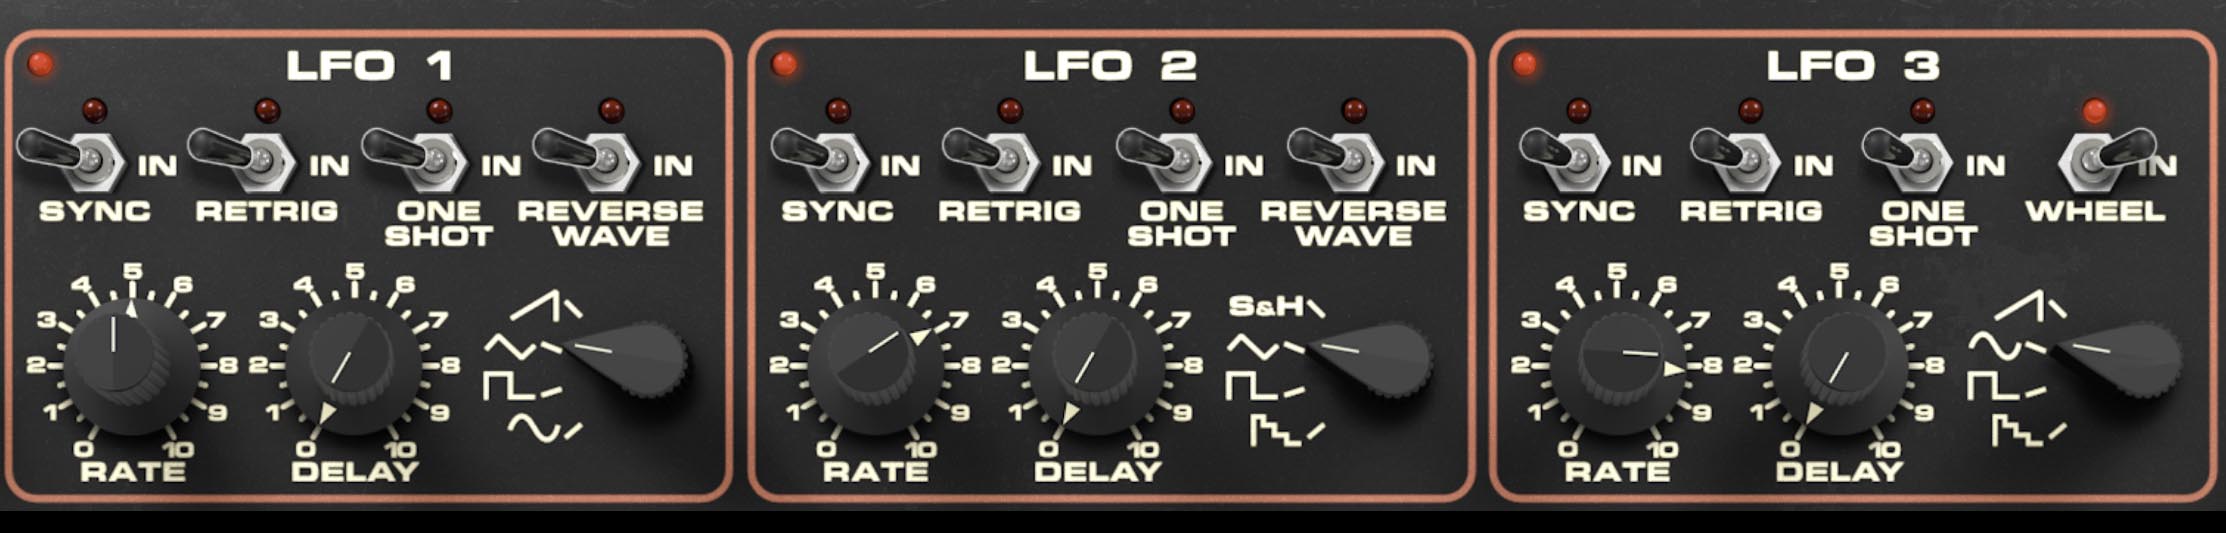
The Three LFOs
The DS-2 includes LFO 1, LFO 2, and LFO 3. All three are low-frequency modulation sources, but they differ in waveform options and in one important performance feature.
It is important to note that unlike the main oscillators that produce the DS-2 characteristically edgy tone, the LFOs are not stepped. They are smooth — with the exception of the purposely stepped saw/ramp on LFO 2 and LFO 3. This gives the stepped saw/ramp waves on LFO 2 and LFO 3 a distinctive stepped character rather than a perfectly smooth rise or fall. This stepped quality is one of the synth’s signature quirks. When used on pitch, it creates motion in discrete little steps rather than a seamless glide, which gives it a wonderfully mechanical, almost sequenced quality
Each LFO includes Rate, Delay, waveform selection, and four switches: Sync, Retrig, One Shot, and a fourth mode switch that differs slightly depending on the LFO. On LFO 1 and LFO 2, that fourth switch is Reverse Wave. On LFO 3, it becomes Wheel.
A good way to think of the three LFOs is this: they share a common operating style, but they each have their own musical personality.
Common LFO Controls
The Rate knob sets the speed of the LFO. Lower settings produce slow, gradual modulation. Higher settings produce faster motion, ranging from animated tremolo and filter wobble to rapid pitch effects and buzzy modulation textures depending on the destination.
The Delay knob sets how long it takes for the LFO modulation to fade in after a note is played. At minimum, modulation begins immediately. As you raise the control, the modulation enters later, which is very useful for sounds that should begin cleanly and then gradually become more animated.
Tip: A little Delay is often the difference between an obvious effect and musical movement. Delayed vibrato, delayed filter motion, and delayed pulse-width animation tend to feel more natural and playable.
The Sync switch locks the LFO rate to the host tempo in a DAW, or to the internal tempo in standalone mode. This is especially useful when you want modulation to line up rhythmically with arpeggios, tempo-synced effects, or repeating envelope patterns.
The Retrig switch causes the LFO to restart its cycle each time a new note is played. With Retrig off, the LFO runs freely. With Retrig on, each note begins from the same point in the LFO cycle, which makes modulation more consistent and repeatable.
Tip: Use Retrig when you want each note to have the same modulation shape at the start. Leave it off when you want freer, less predictable motion across repeated notes.
The One Shot switch causes the LFO to run through its waveform once rather than cycling continuously. This turns the LFO into something closer to a simple modulation contour generator. Depending on the destination and waveform, One Shot can create pitch dips, filter blips, volume swells, and other single-movement gestures.
Tip: One Shot is great for creating movement without adding constant wobble. It’s especially effective for pitch attacks, and one-time swoops or swells that feel more deliberate than a repeating LFO.
LFO 1
LFO 1 offers four waveform choices: ramp/sawtooth, triangle, square, and sine. It also includes a Reverse Wave switch.
The waveform selector chooses the shape of the modulation. The triangle wave creates smooth up-and-down motion, good for classic vibrato and gentle filter movement. The square wave jumps abruptly between two states, which is useful for trills, rhythmic level chopping, and stepped switching effects. The sine wave is the smoothest and most rounded of the bunch, making it ideal for subtle vibrato and natural-feeling motion.
The ramp/sawtooth wave is especially interesting on the DS-2, because it has a distinctive stepped character rather than a perfectly smooth rise or fall. That stepped quality is one of the synth’s signature quirks. When used on pitch, it creates motion in discrete little steps rather than a seamless glide, which gives it a wonderfully mechanical, almost sequenced quality. It’s one of those details that makes the DS-2 feel more characterful.
The Reverse Wave switch flips the selected waveform direction. Most obviously, this changes the direction of ramp-style movement, turning a rising shape into a falling one, or vice versa. That can make a big difference when the LFO is modulating pitch, filter cutoff, or volume.
Tip: The stepped ramp on LFO 1 is fantastic for synthetic staircase pitch effects, clockwork filter motion, or anything that should sound a little robotic in a good way.
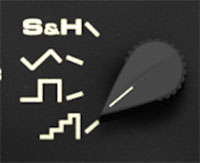
LFO 2
LFO 2 also includes Rate, Delay, Sync, Retrig, One Shot, and Reverse Wave, but its waveform set is slightly different: sample-and-hold, triangle, square, and the same unique stepped ramp/sawtooth wave.
The presence of sample-and-hold makes LFO 2 especially useful for random or semi-random stepped modulation. This is great for burbling filter motion, unpredictable pitch steps, twitchy volume movement, or anything that benefits from controlled instability.
Like LFO 1, the stepped ramp/sawtooth wave is a standout feature here. Because it moves in discrete steps, it can produce very distinctive modulation patterns that feel halfway between an LFO and a primitive sequencer.
Tip: If you want movement that feels electronic, try LFO 2 first. Its stepped and sample-and-hold waveforms are perfect for patches that need unique motion with an almost sequenced feel.
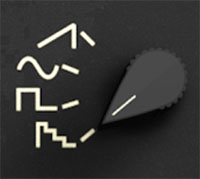
LFO 3
LFO 3 shares much of the same structure, with Rate, Delay, Sync, Retrig, and One Shot, but its fourth switch is Wheel rather than Reverse Wave. Its waveform choices are sawtooth, sine, square, and the same stepped-style waveform shown in the panel graphics.
The Wheel switch ties LFO 3 to the modulation wheel, letting you bring in its effect expressively as part of performance. That makes LFO 3 especially useful as a dedicated "performed" modulation source. For example, you might use it for vibrato, filter opening, or animated effects that only appear when you push the wheel.
This makes LFO 3 feel a little different from the others. Where LFO 1 and LFO 2 are often good candidates for always-on motion or programmed modulation, LFO 3 is particularly well suited for performance-based modulation that you want to introduce in real time.
Tip: A classic setup is to assign LFO 3 to pitch and use the Wheel switch for manual vibrato control. It’s familiar, musical, and immediately playable. It's also a feature that wasn't available on the original DS-2, as it had no dedicated mod wheel (or a third LFO), only the LFO Mixer sliders!
LFO’s Mixer
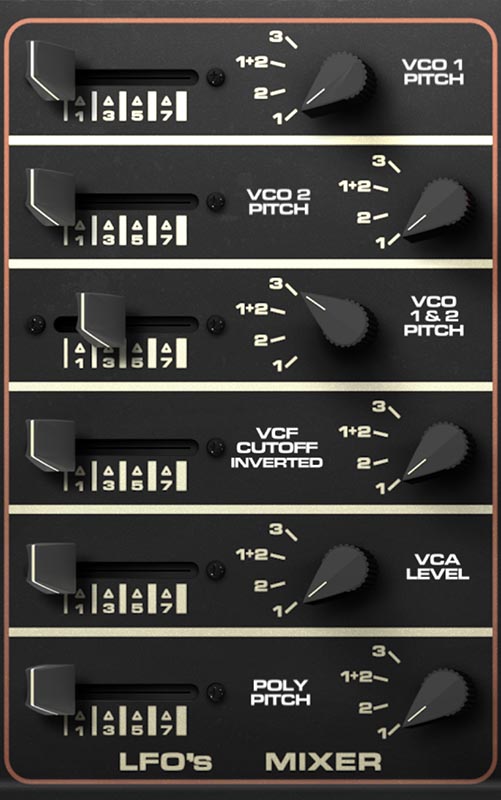
To the left of the three LFOs is the LFO’s Mixer, which gives you six assignable modulation slots. Each slot lets you choose how much modulation is applied, where it goes, and which LFO source is driving it.
Each slot includes three controls arranged from left to right. First is the Modulation Amount slider, which sets the depth of modulation for that slot. In the middle is the destination label. Click this label to choose the modulation destination from the menu. Once selected, the label updates to show the current assignment. On the right is the source selector knob, which chooses which modulation source feeds that slot: LFO 1, LFO 2, LFO 3, or 1+2, which combines LFO 1 and LFO 2.
So the signal flow is simple once you know the layout: the slider sets how much, the center label chooses where, and the right-hand knob chooses which LFO gets sent there. This is also an important detail, because the destination is not selected with the knob. The knob only selects the modulation source. The destination is chosen by clicking the slot’s text label.
The six slots can be assigned to a wide range of parameters across the instrument, letting you route modulation to oscillator pitch, filter behavior, amplifier level, Poly parameters, and plenty more. That makes it easy to build anything from subtle motion to full-tilt animated madness.
The same destination system is also used by the Touch section, which helps make DS-2’s overall modulation architecture feel consistent once you get used to it.
Default LFO Mixer Routings
When you create a new sound, the six LFO Mixer slots default to a useful set of assignments rather than starting completely blank. That’s a smart choice, because it gives you immediate access to some of the most musically useful routings without having to build the system from scratch each time.
The default assignments are:
VCO 1 Pitch
VCO 2 Pitch
VCO 1 & 2 Pitch
VCF Cutoff Inverted
VCA Level
Poly Pitch
That default set covers a lot of classic ground: vibrato, shared pitch motion, inverse filter movement, tremolo, and Poly animation. Even if you end up changing them, they make a solid starting point.
Tip: Before replacing all six default routings, spend a minute auditioning them. The defaults are a useful starter toolkit that you can change if you want.
What “1+2” Means
The 1+2 source setting in each LFO Mixer slot combines LFO 1 and LFO 2. This can create more complex modulation shapes than either LFO alone. For example, you might combine a slow triangle with a stepped ramp, or a sample-and-hold source with a smoother waveform, to get motion that feels irregular and less repetitive.
Tip: If a modulation feels too simple or predictable, try 1+2 before adding more slots. It’s an easy way to create complex movement without making the patch harder to understand.
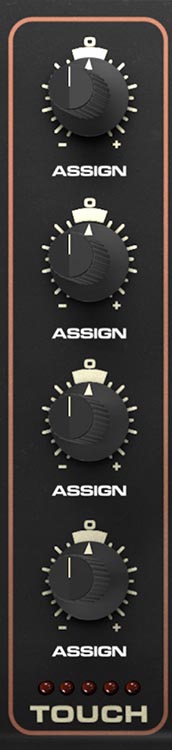
Touch
The Touch section gives you four assignable aftertouch slots, each with a bipolar amount knob labeled Assign. Like the LFO Mixer, the destination is chosen by clicking the Assign label and selecting a destination from the same dropdown menu.
These knobs are bipolar, which means they can apply either positive or negative modulation depending on the direction and amount. That makes the Touch section especially expressive. Pressing harder can increase a parameter, decrease it, or do several different things at once across the four slots.
The DS-2 responds to both channel aftertouch and poly aftertouch, depending on what your controller provides. If your controller sends poly aftertouch, the synth can respond to pressure on individual notes rather than the entire keyboard at once, which opens the door to much more nuanced performance. This isn't just a convenience feature. It’s one of the most powerful expressive tools in DS-2.
Tip: Use Touch for changes you want to play, not changes you want running all the time. It’s perfect for pressure-controlled vibrato, filter opening, added noise, effect blooms, or bringing in Poly brightness as a note sustains.
Creative Ways to Use Touch
Because the knobs are bipolar and the destinations are flexible, the Touch section can do much more than just “press harder for more vibrato.” You can route pressure to VCF Cutoff for expressive brightness. You can use it on VCO pitch for subtle pressure vibrato. You can assign it to Poly Volume or Poly Pitch to let pressure bring in a second layer. You can assign it to Effect Level so a note grows more spacious or more processed as you lean into it. And because there are four slots, you can stack several of these moves at once.
For example, one press could slightly open the filter, add vibrato, raise reverb level, and increase Poly volume all at the same time. That’s how a patch starts to feel less like a programmed preset and more like an instrument you can play.
Tip: One of the best uses of Touch is restraint. A small amount of pressure-controlled movement feels more expressive than a giant obvious sweep.
Modulation Ideas
For classic synth vibrato, route LFO 3 to VCO 1 & 2 Pitch and use the Wheel switch so vibrato comes in only when you raise the mod wheel.
For clockwork or sequenced-feeling motion, use the stepped ramp on LFO 1 or LFO 2 and assign it to pitch or filter cutoff.
For unstable, animated textures, assign LFO 2 sample-and-hold to VCF Cutoff, Noise Volume, or Poly Pitch.
For pulsing movement, route an LFO to VCA Level. This can act like a tremolo, but with waveform choices and combinations that make it far more interesting than a basic tremolo effect.
For evolving layered sounds, use one LFO on Poly Pitch or Poly Volume and another on VCF Cutoff Inverted so different parts of the patch move against one another.
For expressive performance patches, use Touch to open the filter, raise an effect send, or add a little pitch movement as you increase pressure.