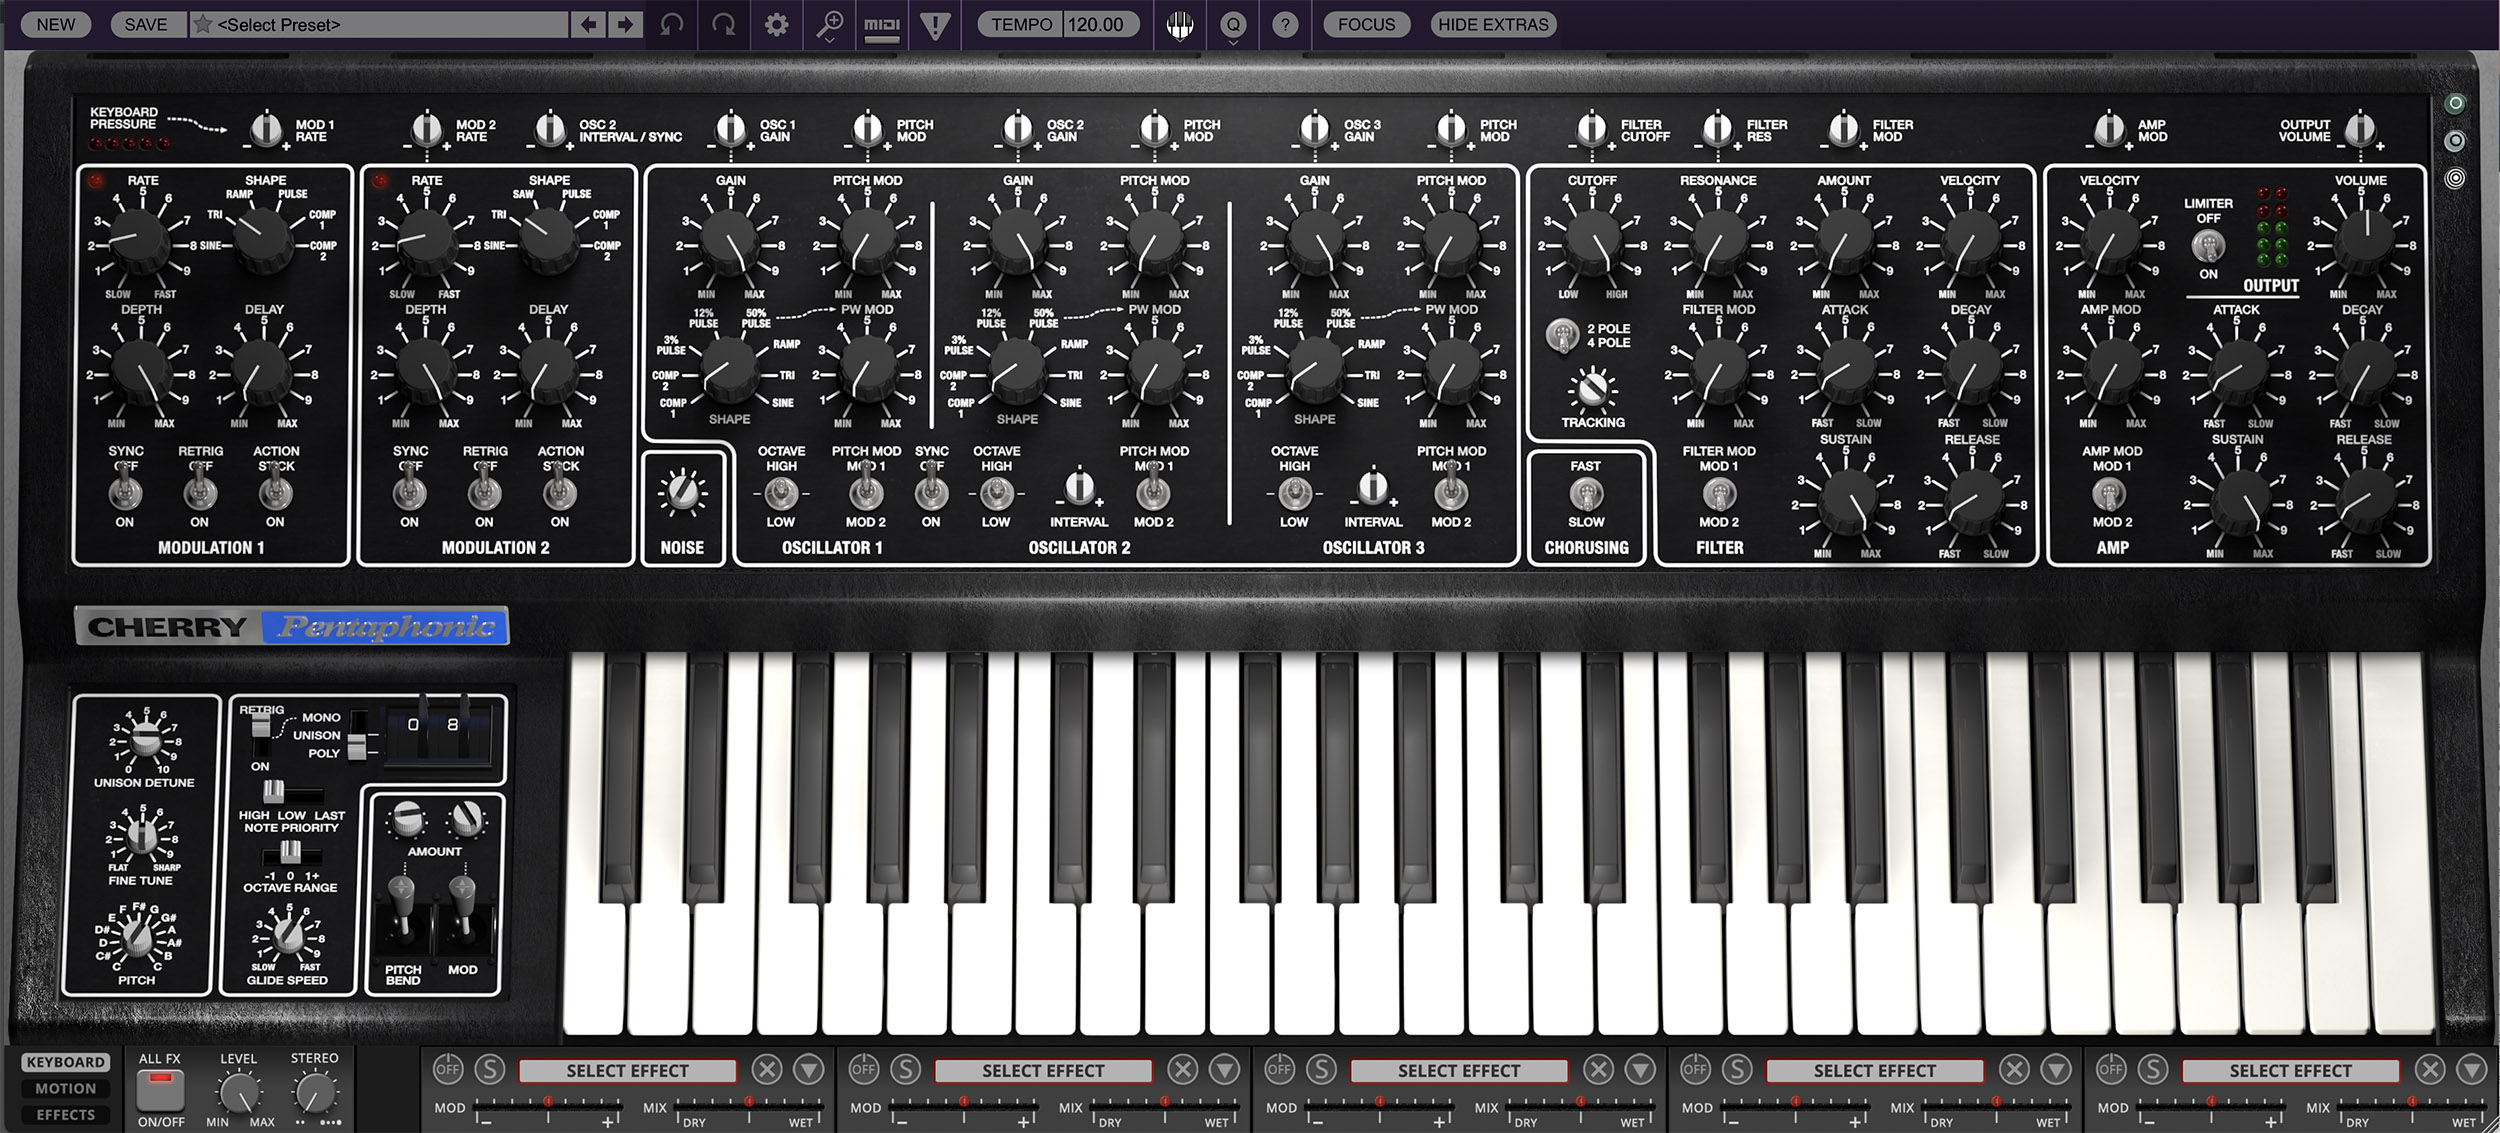
Getting Started
Pentaphonic can run as a standalone instrument or as a plug-in inside a compatible DAW. This chapter covers system requirements, installation and activation, initial audio and MIDI setup, basic editing conventions, MIDI controller assignment, and the quickest route to making your first sound.
SYSTEM REQUIREMENTS
WINDOWS
Windows version 7 or newer
64-bit operating system required
3.4 GHz Quad-Core computer with 8GB of RAM recommended
196 MB Available disk space
Internet connection for product download and activation
MACOS
macOS version 10.13 or newer
64-bit operating system required
Intel or Apple Silicon processor
3.4 GHz Quad-Core or Apple Silicon CPU with 8GB of RAM recommended
196 MB available disk space
Internet connection for product download and activation
Installing Pentaphonic
Download the current Pentaphonic installer from your Cherry Audio account or the download location provided with your purchase.
To download and install Pentaphonic:
Sign in to your Cherry Audio account and locate Pentaphonic in your product library.
Download the appropriate installer for macOS or Windows.
When the download is complete, locate the installer on your computer and double-click it to begin installation.
Follow the on-screen installation instructions and select the desired standalone and plug-in formats.
When installation is complete, close the installer.
Note that the installer filename may include Pentaphonic’s current version number, so the exact filename may differ from examples shown in this guide.
Activating Pentaphonic
Pentaphonic requires authorization through your Cherry Audio account.
When launching Pentaphonic for the first time, follow the login and authorization instructions that appear on screen. Because Cherry Audio’s authorization system may change over time, always follow the instructions presented by the current version of the software.
Once authorized, Pentaphonic can be launched either as a standalone application or as an instrument plug-in inside a compatible DAW.
Using Pentaphonic as a Standalone Instrument
The standalone version of Pentaphonic can be played without opening a DAW. This is useful for exploring presets, designing sounds, practicing, or simply using Pentaphonic as a software instrument on its own.
Before playing, make sure Pentaphonic is using the correct audio output and MIDI input devices.
Configuring Audio and Midi
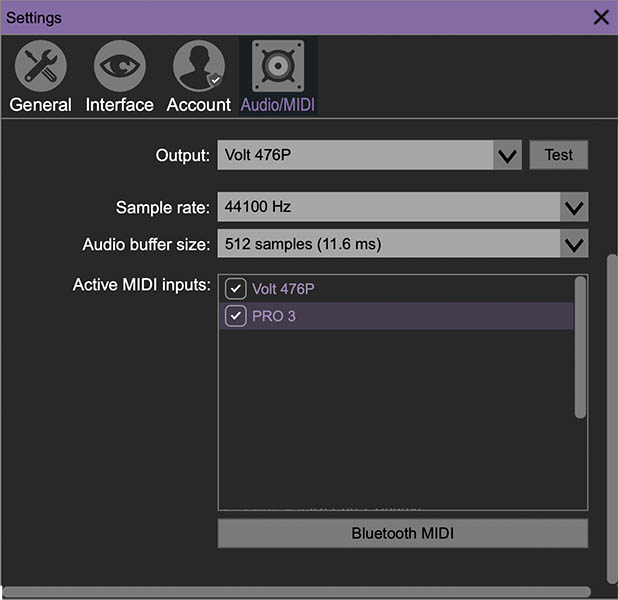
Cherry Audio’s current standalone instruments provide an Audio/MIDI tab in Settings for selecting the audio output, sample rate, buffer size, and active MIDI inputs. This tab appears only in the standalone version because plug-in versions receive their audio and MIDI routing from the host DAW.
To configure Pentaphonic for standalone use:
Launch the standalone Pentaphonic application.
Click the Settings gear icon in the top toolbar.
Select the Audio/MIDI tab.
Choose the desired audio device from the Output menu.
Select the desired Sample Rate.
Select an appropriate Audio Buffer Size.
Under Active MIDI Inputs, enable the MIDI keyboard or controller you want to use.
Play your MIDI controller and confirm that Pentaphonic produces sound.
More than one MIDI input can be enabled if your setup uses separate keyboards, pad controllers, knob or fader controllers, or other MIDI devices. For more information on audio and MIDI configuration, see the Settings chapter.
Audio Buffer Size
The Audio Buffer Size determines the balance between playing latency and processing stability.
Lower buffer settings generally reduce the delay between playing a note and hearing the result, making Pentaphonic feel more immediate when performing.
Higher buffer settings give the computer more time to process audio and can help prevent clicks, crackles, or dropouts when the system is under heavier load.
For normal playing, choose the lowest buffer setting that operates reliably on your system.
An external audio interface will generally provide better low-latency performance than a computer’s built-in audio hardware, although the best setting depends on your computer, interface, sample rate, and overall system load. Cherry Audio uses this same latency-versus-stability approach in its current standalone instruments.
Playing Pentaphonic Without a MIDI Controller
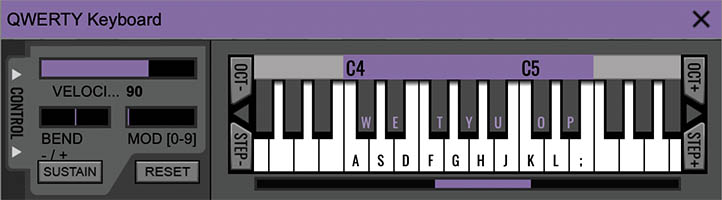
If you don’t have a MIDI keyboard connected, Pentaphonic can use your computer keyboard to trigger notes. Click the circular keyboard icon in the top toolbar to open Cherry Audio’s QWERTY Musical Typing Keyboard.
The Musical Typing Keyboard lets you play notes from the computer keyboard or directly with the mouse. It also provides access to keyboard range, velocity, pitch bend, modulation, and sustain controls. This provides a convenient way to audition presets, test your installation, or work with Pentaphonic when a hardware controller isn’t available. For more information on The QWERTY Musical Typing Keyboard, see the QWERTY Musical Typing Keyboard chapter.
Using Pentaphonic in a DAW
Pentaphonic can also be used as an instrument plug-in inside a compatible digital audio workstation. The exact procedure varies somewhat between DAWs, but the basic process is the same.
To use Pentaphonic in a DAW:
Launch your DAW.
Create a new software instrument or instrument track.
Insert Pentaphonic as the instrument plug-in.
Select or arm the track as required by your DAW.
Play your MIDI controller and confirm that Pentaphonic receives MIDI and produces audio.
If Pentaphonic doesn’t appear in the DAW’s plug-in list immediately after installation, quit and relaunch the DAW so it can scan newly installed plug-ins.
When Pentaphonic runs as a plug-in, audio routing, MIDI input, sample rate, and buffer size are normally managed by the host DAW rather than by Pentaphonic itself.
Useful Editing Conventions and Key Shortcuts
Pentaphonic uses Cherry Audio’s standard editing conventions. These make everyday programming faster and are worth becoming familiar with before diving into the instrument in detail.
Adjusting Controls
Click and drag a knob, slider, or switch to change its value.
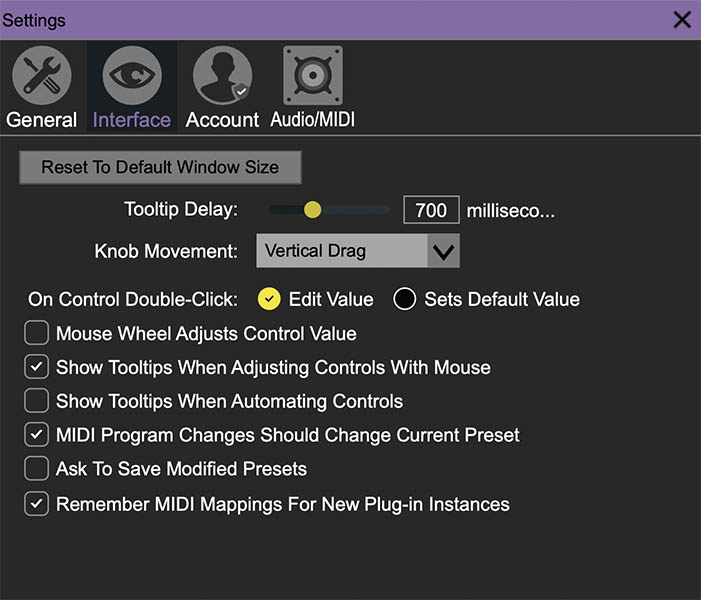
Cherry Audio’s current Settings allow knob response to be configured for Vertical Drag, Horizontal Drag, or Rotary Drag. Mouse-wheel adjustment can also be enabled or disabled.
Entering an Exact Value
When Settings > Interface > On Control Double-Click is set to Edit Value, double-click a compatible control, type the desired value, then press Enter or Return.
This is useful when a parameter needs an exact setting rather than an approximate mouse adjustment.
Resetting a Control
The same double-click preference can instead be set to Sets Default Value. When this option is selected, double-clicking a control returns it to its default setting.
Because double-click behavior is user-configurable, check this setting if double-clicking a control doesn’t produce the result you expect.
Tooltips
Pentaphonic displays parameter values and other useful information in tooltips while controls are adjusted.
Cherry Audio’s current Settings let you configure tooltip delay and whether tooltips appear when parameters are adjusted manually or by automation.
Tooltips are especially useful while learning the instrument because they provide precise parameter values without requiring those values to be permanently printed across the panel.
Using MIDI Learn
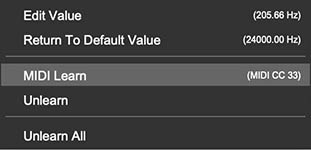
MIDI Learn lets you map a physical knob, slider, wheel, button, or other MIDI control to an onscreen Pentaphonic parameter.
This is especially useful if your controller has familiar synthesizer controls. Mapping hardware filter, envelope, or modulation controls to their Pentaphonic counterparts can make programming feel considerably more hands-on.
Cherry Audio’s current MIDI Learn system allows assignments to be created directly by right-clicking the parameter you want to control.
Assigning a MIDI Controller
To assign a hardware control using MIDI Learn:
Right-click the Pentaphonic control you want to map. For example, right-click FILTER CUTOFF.
Choose MIDI Learn.
Move the knob, slider, wheel, or other control on your external MIDI controller that you want to assign.
Pentaphonic learns the incoming MIDI controller and maps it to the selected onscreen parameter.
Move the hardware control again to confirm that the Pentaphonic parameter follows it.
During MIDI Learn, Cherry Audio’s current instruments display a colored overlay indicating that the selected control is waiting for incoming controller data. The overlay disappears once the assignment has been completed. If you enter MIDI Learn accidentally, right-click the control and choose Stop Learning.
For more information MIDI configuration, see the MIDI Controllers Setup chapter
The MIDI Tab
Click MIDI in Pentaphonic’s top toolbar to display the MIDI tab.
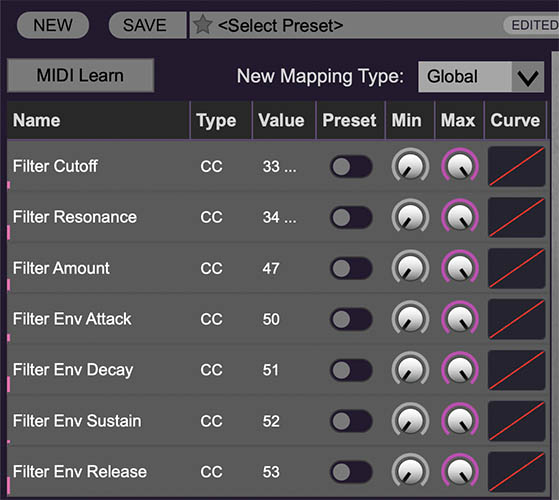
The MIDI tab provides a central location for viewing and editing controller assignments. Cherry Audio’s current implementation lets you examine assigned controls, adjust their operating ranges, invert their response, alter controller curves, and remove assignments.
It also provides a faster way to assign several controls at once.
To assign multiple controls from the MIDI tab:
Click MIDI in the top toolbar.
Click MIDI Learn.
Click the first Pentaphonic control you want to assign.
Move the desired hardware control.
Click another Pentaphonic control.
Move the next hardware control.
Continue assigning controls as needed.
Click Stop Learning when you’re finished.
A single hardware control can be assigned to more than one Pentaphonic parameter. Combined with individual range, inversion, and curve settings, this can create useful performance macros in which one hardware gesture changes several aspects of a sound at once. For more information on the MIDI Tab, see the MIDI Controllers Setup chapter.
Removing MIDI Assignements
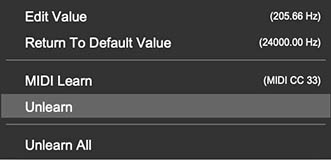
Right-click an assigned parameter in the MIDI tab and choose Unlearn to remove its controller assignment.
Choose Unlearn All when you want to remove all controller assignments. Cherry Audio displays a warning before clearing the complete mapping set.
Remembering MIDI Mappings
Cherry Audio’s current Settings include Remember MIDI Mappings For New Plug-in Instances. When enabled, the instrument remembers the MIDI Tab controller settings when additional plug-in instances are opened.
This is particularly useful when you regularly use the same hardware controller with Pentaphonic. Once your preferred filter, modulation, envelope, and performance controls are mapped, you can reuse the same hardware layout rather than rebuilding it for every new instance.
Your First Sound
Once Pentaphonic is running, the fastest way to get acquainted is simply to play it.
Start by exploring several factory presets. Listen to how different sounds use oscillator combinations, tuning, filter movement, envelope shape, modulation, chorusing, and effects. Then begin adjusting the controls that have the most immediate impact on the sound.
A good first exploration might look something like this:
Load a preset that interests you.
Play single notes and chords across several octaves.
Adjust OSC 1 SHAPE and listen to how the waveform changes the basic timbre.
Experiment with OSC 2 SHAPE and OSC 3 SHAPE, listening to how the three oscillators combine.
Adjust FILTER CUTOFF to move the sound from bright and open to progressively darker.
Raise FILTER RES and listen to the increasing emphasis around the cutoff frequency.
Adjust FILTER AMOUNT and the Filter envelope controls to hear how brightness develops over the life of each note.
Experiment with MODULATION 1 or MODULATION 2 and increase DEPTH to introduce movement.
Switch CHORUSING between its available settings and listen to the change in width and motion.
Open the Effects view and experiment with one of the available effects.
Return to the main panel and change only one or two controls at a time.
When something interesting happens, keep going.
You don’t need to understand every part of Pentaphonic before you begin creating useful sounds. Most of its fundamental synthesis controls are directly accessible on the main panel, and the basic signal path is straightforward.
Start with what you can hear immediately. The deeper modulation, performance, and effects features will make considerably more sense once you understand the sound you’re trying to shape.
A Few Useful Starting Points
If you’re new to Pentaphonic, these controls provide especially quick ways to understand the instrument:
OSC 1, OSC 2, and OSC 3 SHAPE establish the harmonic character of the three oscillators.
OSC 1, OSC 2, and OSC 3 GAIN determine how strongly each oscillator contributes to the sound.
FILTER CUTOFF provides the most immediate tonal shaping.
FILTER RES emphasizes frequencies around the cutoff point.
FILTER AMOUNT determines how strongly the Filter envelope moves the cutoff.
FILTER ATTACK, DECAY, SUSTAIN, and RELEASE shape the development of brightness over time.
AMP ATTACK, DECAY, SUSTAIN, and RELEASE shape the volume contour.
MODULATION 1 and MODULATION 2 add movement to pitch, wave shape, filter, amplitude, and other destinations.
CHORUSING adds width and animation.
UNISON DETUNE thickens stacked voices.
Effects extend the basic synth architecture with additional processing and ambience.
You don’t need to use all of these at once. In fact, it’s usually better not to.
Begin with one oscillator and establish the basic sound. Add the second and third oscillators when you know what you want them to contribute. Then shape the result with the filter and envelopes before introducing modulation and effects.
Three oscillators can sound incredible. But three oscillators all demanding equal attention can also sound overwhelming.
If You Don't Hear Anything
If Pentaphonic is running but you don’t hear sound, check the following:
Make sure the correct audio device is selected in Settings > Audio/MIDI when using the standalone application.
Make sure your MIDI keyboard or controller is enabled under Active MIDI Inputs.
Confirm that OUTPUT VOLUME is turned up.
Make sure at least one oscillator GAIN control is raised.
Check the Amp envelope, particularly its Sustain setting.
Make sure FILTER CUTOFF isn’t set so low that most or all of the oscillator signal is being removed.
If using Pentaphonic in a DAW, make sure the instrument track is selected, enabled, or record-armed as required by the host.
Confirm that the appropriate MIDI input is reaching the Pentaphonic track.
Check that your audio interface, speakers, or headphones are connected and operating normally.
If a MIDI note becomes stuck, click the MIDI Panic button in the top toolbar.
Once Pentaphonic is producing sound, you’re ready to begin exploring the instrument in detail. The chapters that follow work through its controls and signal path section by section, beginning with the sound-generating architecture itself.